The post below will walk through the deployment of an external vCenter Server Appliance (VCSA) 6.5 node and Platform Services Controller (PSC) to a target ESXi server using the command line interface (CLI) deployment method.
If you are interested in also seeing the GUI deployment or other GUI/CLI deployments, please see my post here which has links off to other individual articles for different deployment methods.
For each of the deployment methods I am providing a video as well. Please find the video for the VCSA External CLI deployment below. This has been recorded in FullHD, so best to watch it in Full Screen!
Introduction
The VCSA can be deployed using either the new GUI installer or by CLI from Windows, Mac and Linux machines. After playing with the CLI a little in the lab, it has become my preferred deployment method over the GUI. A JSON file is used to define the configuration of the node(s) and then a one liner performs the deployment and configuration of the node(s) without the normal GUI “Next Next” trek.
The CLI deployment is fully supported by VMware in 6.5 and they have also done a great job of providing a number of JSON template files depending on your deployment scenario.
One thing to note is that I don’t think any of the template files have the NTP server defined. In my experience, DNS and NTP are the two biggest causes of issues when performing a deployment or upgrade. In the steps below I’ll show you where to enter the NTP settings into the JSON configuration file.
Let’s go ahead and get started.
First Steps
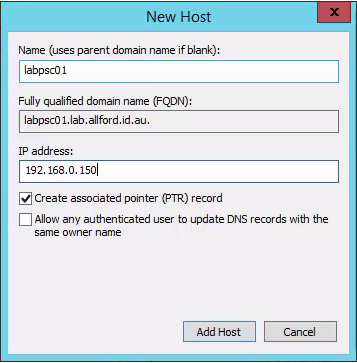
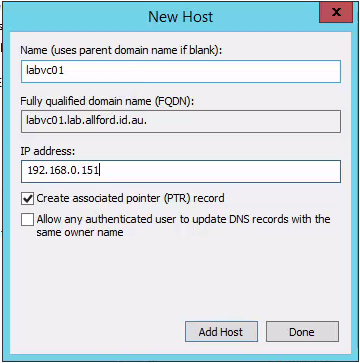
The first thing I do before deploying any appliance is making sure there is a DNS record with forward and reverse records. For this walkthrough I’m naming the PSC node labpsc01.lab.allford.id.au (192.168.0.150) and the VC node labvc01.lab.allford.id.au (192.168.0.151).
Exploring the VCSA ISO
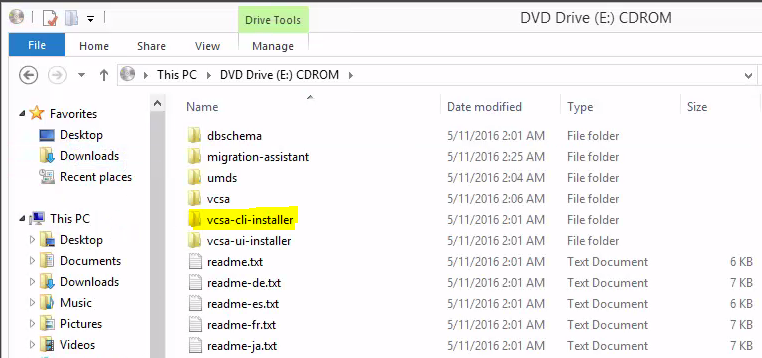
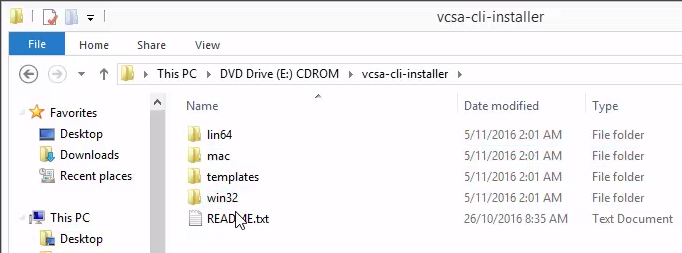
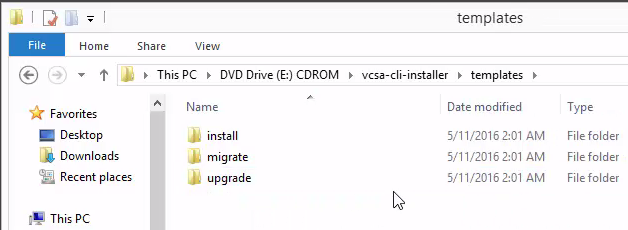
Next, let’s take a look at the VCSA ISO file that I’ve downloaded from VMware. If we mount the ISO file and then open it, you’ll see a folder named vcsa-cli-installer. Inside there, you’ll find folders for Linux, Mac and Windows, as well as a templates folder.
Let’s dive into the templates folder and take a look, as this is where the example JSON configuration files are installed. Inside the templates folder, there are subfolders for install, migrate and upgrade. The CLI tool can be used to perform a new installation, a migration from Windows VC to the appliance as well as an upgrade. Head into the install folder and you will see the JSON templates provided by VMware.
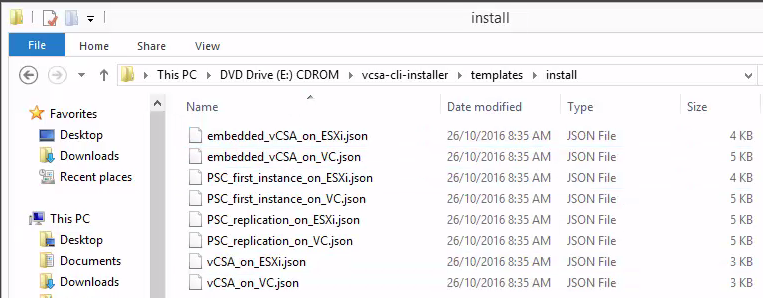
As you can see, VMware have provided template files for a number of deployment scenarios. In this walkthrough we’re going to be using two of these templates:
- PSC_first_instance_on_ESXi.json - This will define the configuration for the first external PSC in a vSphere SSO domain
- vCSA_on_ESXi.json - This will define the configuration for a vCenter Server being pointed to an external PSC
I’m going to copy these files from the ISO into C:\temp so I can edit them.
Create JSON files
With the JSON configuration files, you can go ahead and open these in any text editor to make the changes required. There is a bit of a description for each setting as to what is required. I recommend watching the video at the start of this post as I walk through each of the settings. Although you can open in a text editor, I came across a neat JSON online editor (http://www.jsoneditoronline.org/) that I show you in my YouTube clip as well.
I’ve put the output of my completed JSON files for the PSC and VC nodes below below. I’ve also entered in a section for the NTP server as well, which I recommend you do too. Make sure to put the comma on the line above the NTP.Servers entry and save the JSON file.
The vSphere 6.5 documentation contains information for all of the settings that can be used within the JSON file - https://pubs.vmware.com/vsphere-65/index.jsp#com.vmware.vsphere.install.doc/GUID-457EAE1F-B08A-4E64-8506-8A3FA84A0446.html
PSC JSON File
{
  "__version": "2.3.0",
  "__comments": "Sample template to deploy a Platform Services Controller appliance as the first instance in a new vCenter Single Sign-On domain on an ESXi host.",
  "new.vcsa": {
    "esxi": {
      "hostname": "esxi01.lab.allford.id.au",
      "username": "root",
      "password": "",
      "deployment.network": "MattLab_MGMT",
      "datastore": "esx10_Local"
    },
    "appliance": {
      "thin.disk.mode": true,
      "deployment.option": "infrastructure",
      "name": "labpsc01"
    },
    "network": {
      "ip.family": "ipv4",
      "mode": "static",
      "ip": "192.168.0.150",
      "dns.servers": [
        "192.168.0.100"
      ],
      "prefix": "24",
      "gateway": "192.168.0.1",
      "system.name": "labpsc01.lab.allford.id.au"
    },
    "os": {
      "password": "VMware1!",
      "ssh.enable": true,
      "ntp.servers": "192.168.0.100"
    },
    "sso": {
      "password": "VMware1!",
      "domain-name": "vsphere.local",
      "site-name": "Site1"
    }
  },
  "ceip": {
    "description": {
      "__comments": [
        "++++VMware Customer Experience Improvement Program (CEIP)++++",
        "VMware's Customer Experience Improvement Program (CEIP) ",
        "provides VMware with information that enables VMware to ",
        "improve its products and services, to fix problems, ",
        "and to advise you on how best to deploy and use our ",
        "products. As part of CEIP, VMware collects technical ",
        "information about your organization's use of VMware ",
        "products and services on a regular basis in association ",
        "with your organization's VMware license key(s). This ",
        "information does not personally identify any individual. ",
        "",
        "Additional information regarding the data collected ",
        "through CEIP and the purposes for which it is used by ",
        "VMware is set forth in the Trust & Assurance Center at ",
        "http://www.vmware.com/trustvmware/ceip.html . If you ",
        "prefer not to participate in VMware's CEIP for this ",
        "product, you should disable CEIP by setting ",
        "'ceip.enabled': false. You may join or leave VMware's ",
        "CEIP for this product at any time. Please confirm your ",
        "acknowledgement by passing in the parameter ",
        "--acknowledge-ceip in the command line.",
        "++++++++++++++++++++++++++++++++++++++++++++++++++++++++++++++"
      ]
    },
    "settings": {
      "ceip.enabled": true
    }
  }
}
VC JSON File
{
  "__version": "2.3.0",
  "__comments": "Sample template to deploy a vCenter Server Appliance with an external Platform Services Controller on an ESXi host.",
  "new.vcsa": {
    "esxi": {
      "hostname": "esxi01.lab.allford.id.au",
      "username": "root",
      "password": "",
      "deployment.network": "MattLab_MGMT",
      "datastore": "esx10_Local"
    },
    "appliance": {
      "thin.disk.mode": true,
      "deployment.option": "management-tiny",
      "name": "labvc01"
    },
    "network": {
      "ip.family": "ipv4",
      "mode": "static",
      "ip": "192.168.0.151",
      "dns.servers": [
        "192.168.0.100"
      ],
      "prefix": "24",
      "gateway": "192.168.0.1",
      "system.name": "labvc01.lab.allford.id.au"
    },
    "os": {
      "password": "VMware1!",
      "ssh.enable": true,
      "ntp.servers": "192.168.0.100"
    },
    "sso": {
      "password": "VMware1!",
      "domain-name": "vsphere.local",
      "platform.services.controller": "labpsc01.lab.allford.id.au",
      "sso.port": "443"
    }
  }
}
Using vcsa-deploy
Now that we have JSON files that specify the configuration of both of the nodes, we can dive into running the CLI utility to verify the data in the configuration file is correct and then move onto deploying the appliances.
Open up a command prompt and browse to the following location, where the drive represents the VCSA ISO file we mounted earlier (for me this is E:) - E:\vcsa-cli-installer\win32
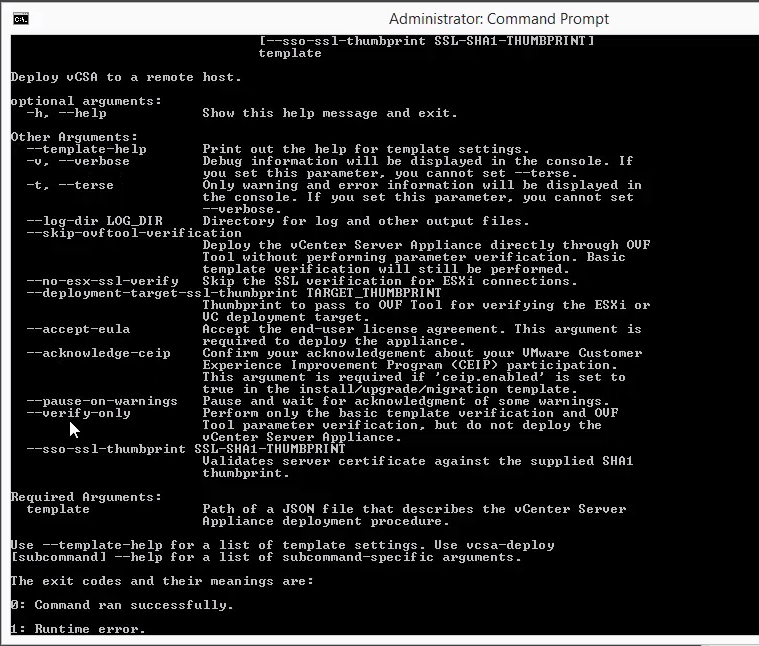
Run the following command to show the help and available options for the install configuration of the tool:
vcsa-deploy.exe install -h
Verify the JSON Files
This step is absolutely optional, you can just skip straight to deploying if you like, but I wanted to show that there is functionality to validate the file prior to attempting to deploy the VCSA.
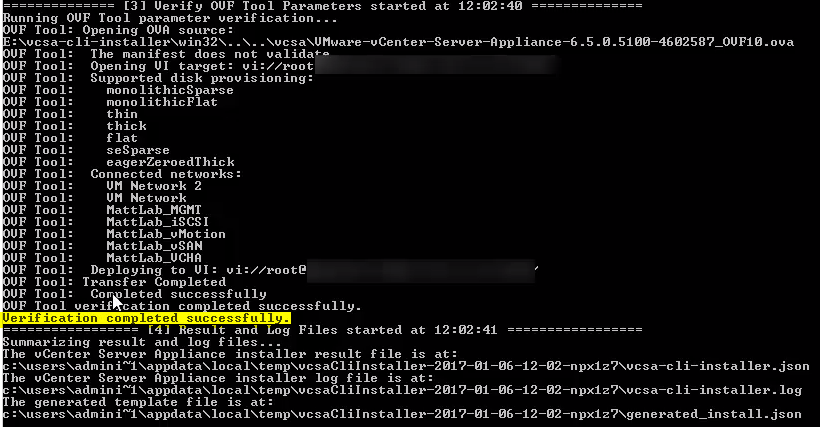
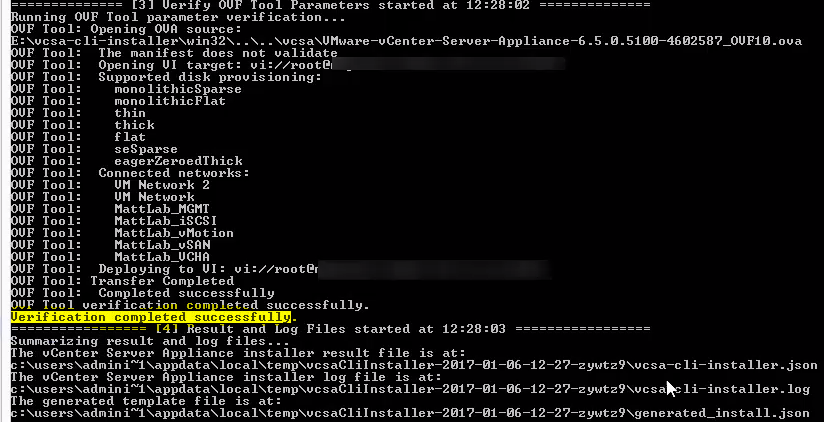
Run the following commands to perform a verification of the JSON configuration files. With these switches we are acknowledging the CEIP (–acknowledge-ceip), accepting the End User License Agreement (–accept-eula) and suppressing a warning if the target ESXi node doesn’t have a valid SSL certificate installed (–no-esx-ssl-verify). The –verify-only switch determines that we just want to validate the configuration file and the details for the target ESXi node are correct. After running the below, you’ll be prompted to enter the password for the root account for the target ESXi node.
As you will see towards the bottom of the screenshot, the verification completed successfully, so we know that the data and ESXi host details we have provided in the JSON file for each node is valid.
Verify PSC:
vcsa-deploy.exe install --acknowledge-ceip --accept-eula --no-esx-ssl-verify --verify-only c:\temp\PSC_first_instance_on_ESXi.json
Verify VC:
vcsa-deploy.exe install --acknowledge-ceip --accept-eula --no-esx-ssl-verify --verify-only c:\temp\vCSA_on_ESXi.json
Deploy and Configure Appliances
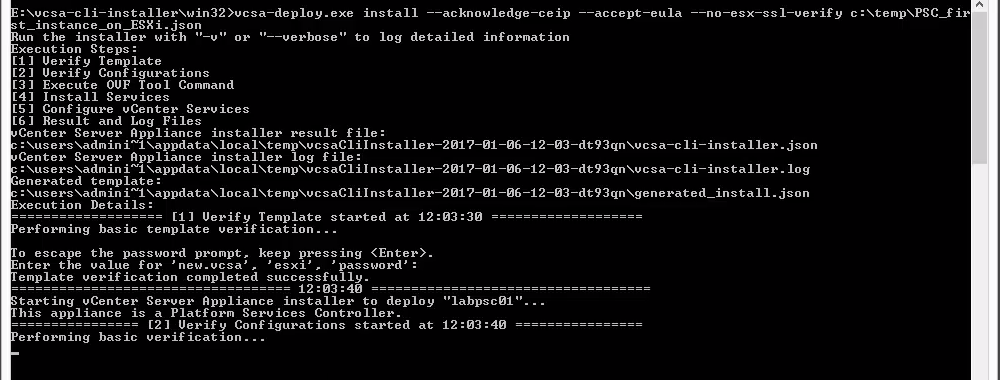
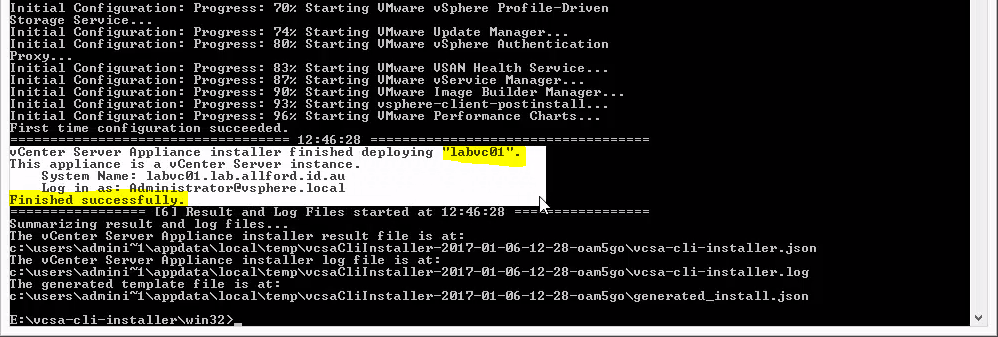
It’s now time to run the command that will actually do the deployment for us. The commands below are similar to the above, but without the verify switch (–verify-only). This instructs the CLI utility to perform the deployment of the appliances. After running the below, you’ll be prompted to enter the password for the root account for the target ESXi node again.
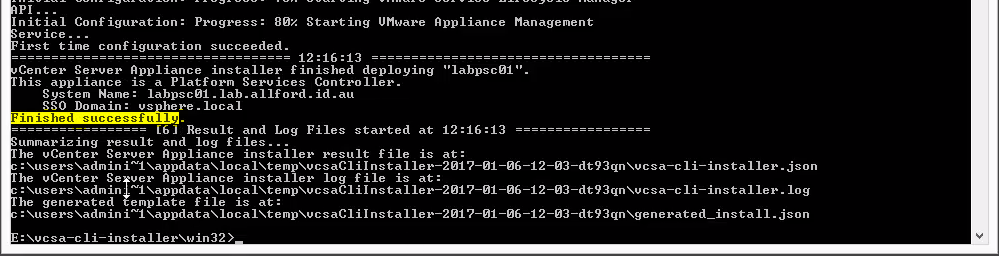
Once these are started, go and grab a beer, as it will take around 15 minutes to deploy, configure and for the services to start up on each node.
Deploy PSC Node
vcsa-deploy.exe install --acknowledge-ceip --accept-eula --no-esx-ssl-verify c:\temp\PSC_first_instance_on_ESXi.json
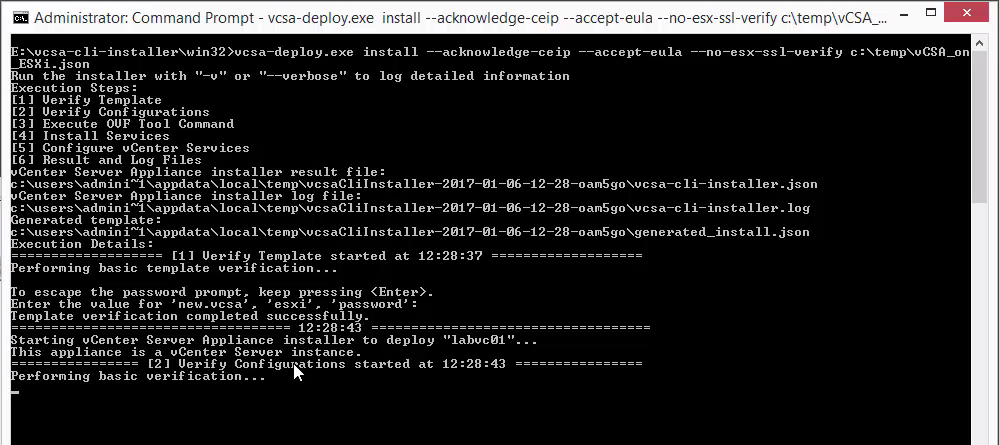
Deploy VC Node
vcsa-deploy.exe install --acknowledge-ceip --accept-eula --no-esx-ssl-verify c:\temp\vCSA_on_ESXi.json
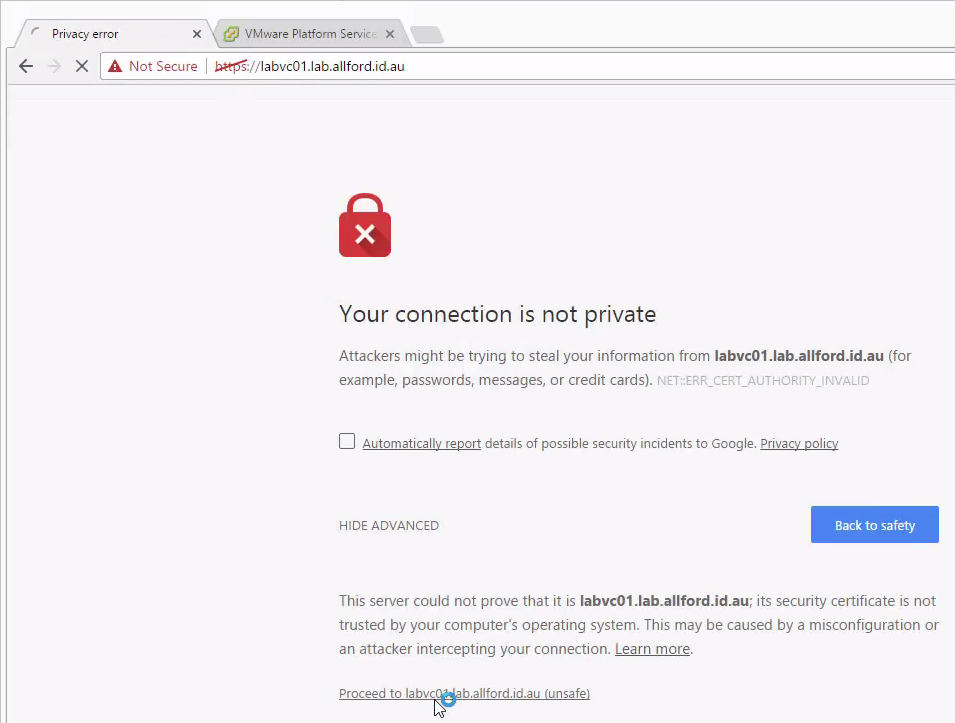
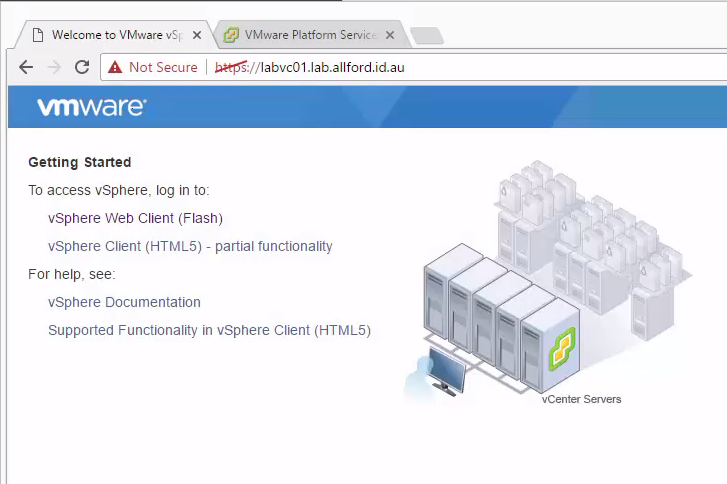
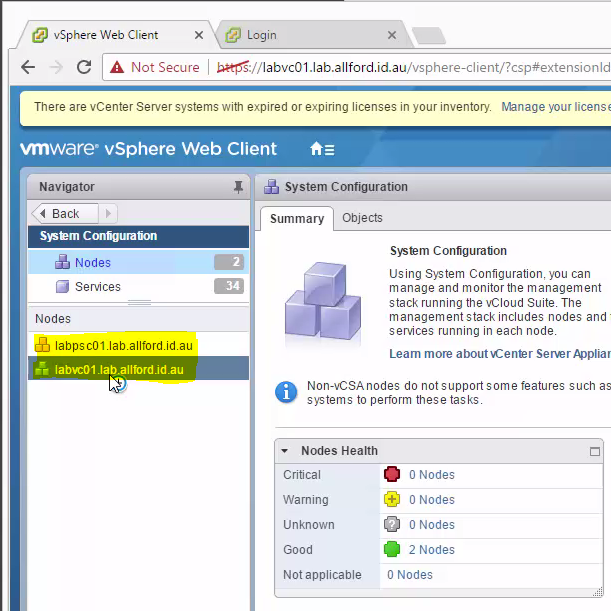
After the nodes have been deployed, we can go ahead and launch a browser to the vCenter Server and log in to the web client, where you can see that in this deployment we have two nodes; a Platform Services Controller and a vCenter Server.
Summary
As you can see, once you know how the deployment works this can become very powerful and easy to use. Entering a few details into the JSON file and then kicking off the deployment is much quicker than having to walk through the GUI installer and the CLI deployment is required in my opinion if you are doing a lot of lab work.
I hope this post has been helpful for you and thanks for reading.