I’ll be upfront and honest - backup and recovery doesn’t excite me, and it never has. On the other hand, this world of data management, policy driven protection / placement and analysis of said data does tweak my interest, which is why I taken an interest in tinkering with some of the modern platforms, for want of a better term, such as Cohesity. But as I was reading through the “what’s new” section of Cohesity DataPlatform 6.3, which I’ve got early access to (Thanks Pete Marfatia), I saw the following comment:
Active Directory backup and granular recovery—DataPlatform introduces support for AD backup and granular item-level recovery.
This is probably something a lot of people expect from a data protection solution so I thought it was worth writing about to ensure users or people looking at Cohesity are aware that is is coming.
The following comment was taken from a Cohesity Blog Post regarding the 6.3 release:
Protect your complete Microsoft environment with added support for Active Directory domain servers with granular backup and recovery. This includes recovery of the entire server or individual databases, but also down to the granular user-level recovery.
My lab has been neglected lately, as has this blog, so I figured it was a good excuse to give this new functionality a run in the lab. I chose to run a basic scenario of:
- Configuring data protection of Active Directory
- Deleting a user account
- Walking through the restore process for the individual user account
If you’re interested in what that looks like, please be my guest and read on below. I was going to put this together in to a short video clip but time got the better of me over the weekend, so it’s a traditional text and screenshot walkthrough.
Before I get in to it, it is worth noting that from my several restore tests so far, the process is simple and flexible which is what you’ll come to learn about Cohesity after using the solution. Everything also ties in to the existing UI and workflow process, so there’s not really anything to learn.
Configure Source
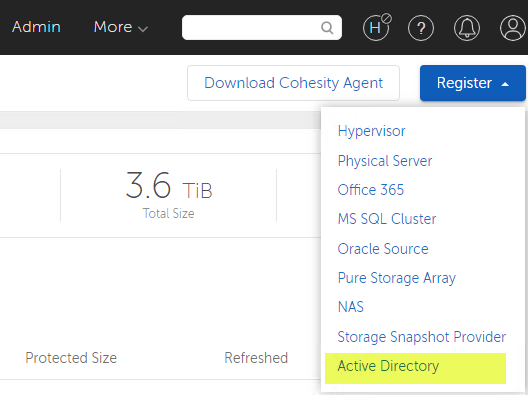
Ok. If you are familiar with Cohesity, you’ll know by now that most of their new protection features start by registering a corresponding new Source type. If you aren’t familiar with Cohesity, Sources are what Cohesity refers to as, well, the source (surprisingly) system that you want to protect. In our instance here, if you browse to Protection > Sources > Register, you’ll see a new shiny option for Active Directory.
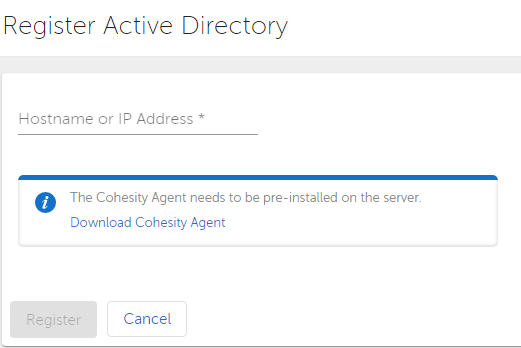
We get asked for the IP address or hostname, and we’re also told on this screen that the Cohesity agent needs to be installed. Because I can, I tried to register one of my AD servers without the agent installed, and sure enough it gave me a helpful error message. So I went ahead, downloaded the agent and installed it on both of my lab AD servers. I’m not going to walk through the install of the agent, it’s really straight forward.

I went ahead and registered both of my AD servers after getting the agent installed, and now under Protection > Sources there are two new entries for Active Directory.

Configure Protection
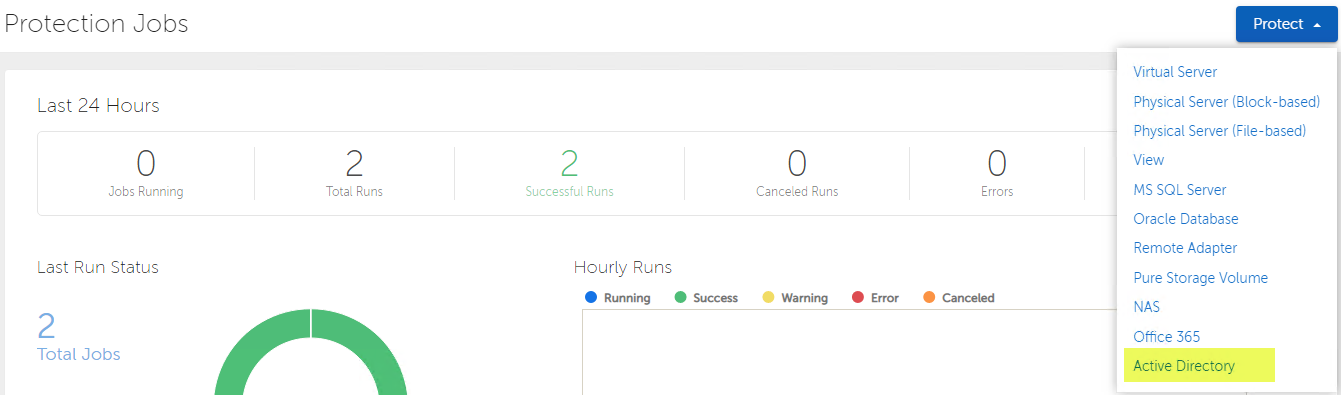
It’s now time to go ahead and set up a protection job. I bounce over to the usual area of Protection > Protection Jobs, and under the Protect drop down, sure enough I see a shiny new entry for Active Directory.
As per the standard Cohesity protection settings, we get asked to enter a name, optional description and select the source for this protection job. You also get the chance to go and register a new source here if you forgot to do so.
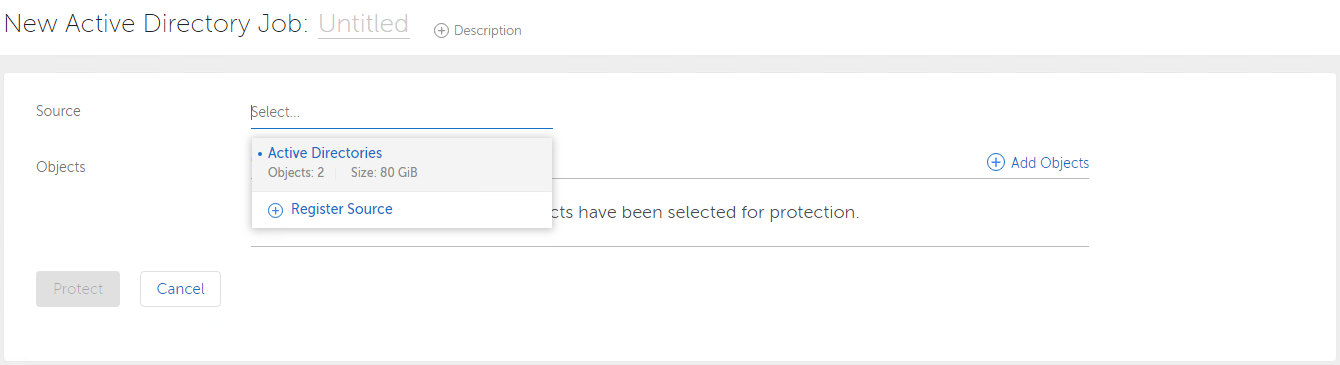
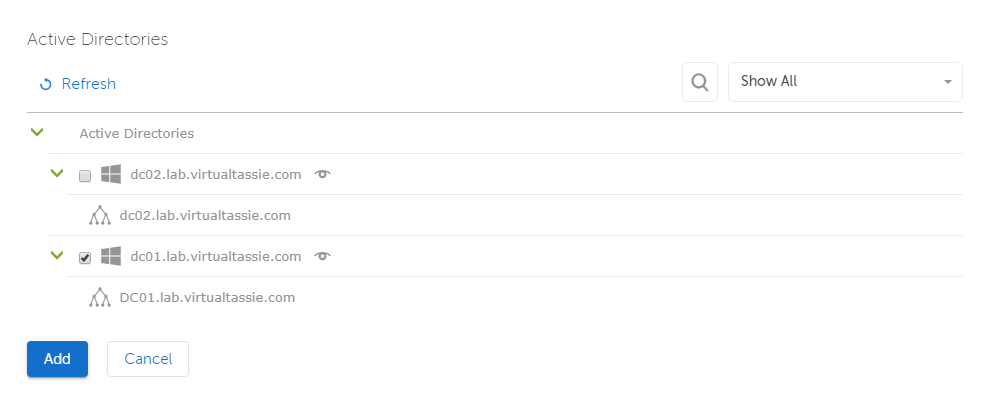
After selecting Active Directory as the source, I get presented with the AD servers I’ve registered. At this point in time, I just select my first domain controller, DC1.
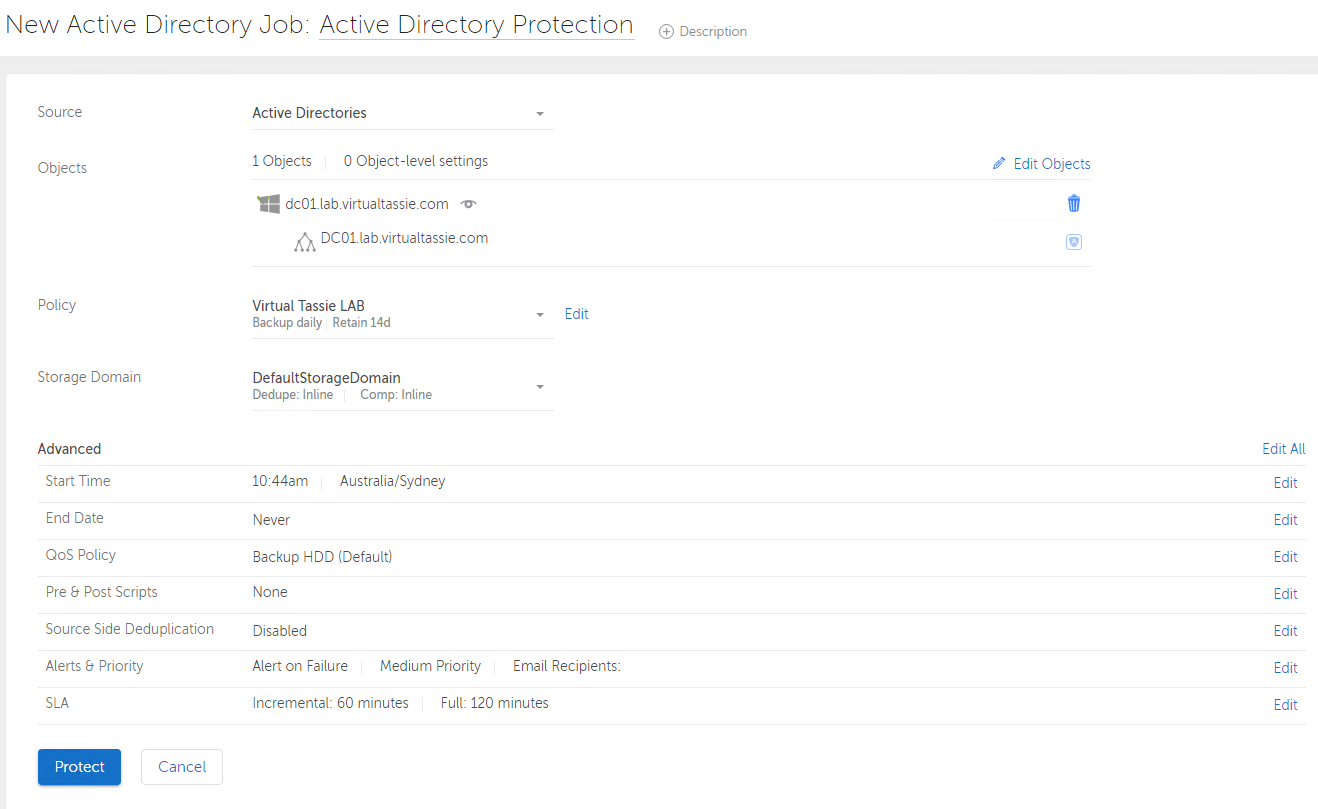
I then complete the rest of the settings which only involves selecting a policy and a storage domain. I’m using an existing policy that I’ve created before, in my lab I only have one storage domain to select. The advanced settings are specific to each protection job and I do get the opportunity here to change them if desired, but I leave them as-is and click Protect to create the protection job.
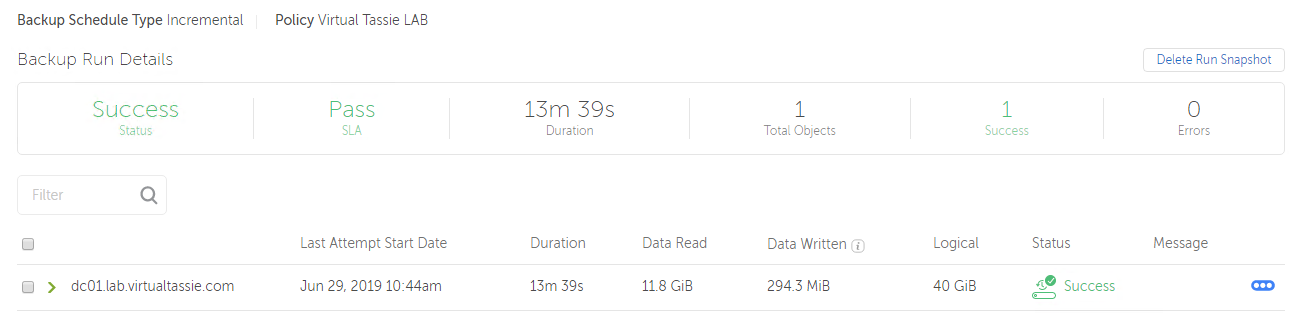
Straight away I see the protection job kick in to action and starts protecting Active Directory for me. After a few minutes I can see the protection job was successful and that my Active Directory deployment is now protected by Cohesity.

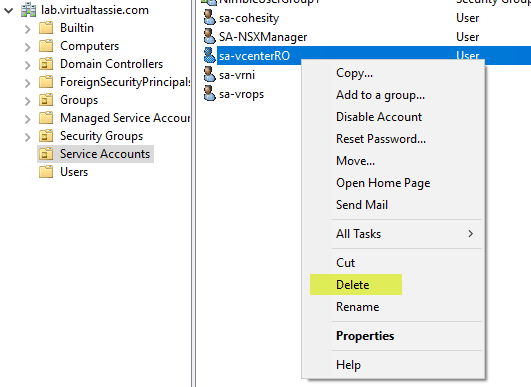
I decide to jump in to Active Directory Users and Computers and delete one of my service accounts, sa-vcenterRO. I know this is a basic example, but I just wanted to kick the tyres with a simple user restoration.
Recovery
Oh no! I no longer have read only access to vCenter Server for some of my other solutions that are integrated. Hopefully Cohesity can restore the account, because I actually don’t have any other data protection of Active Directory in place.
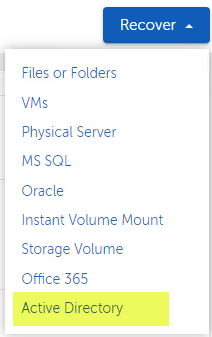
Back in the Cohesity UI, if we go to Protection > Recovery > Recover, again we see a new option for Active Directory.
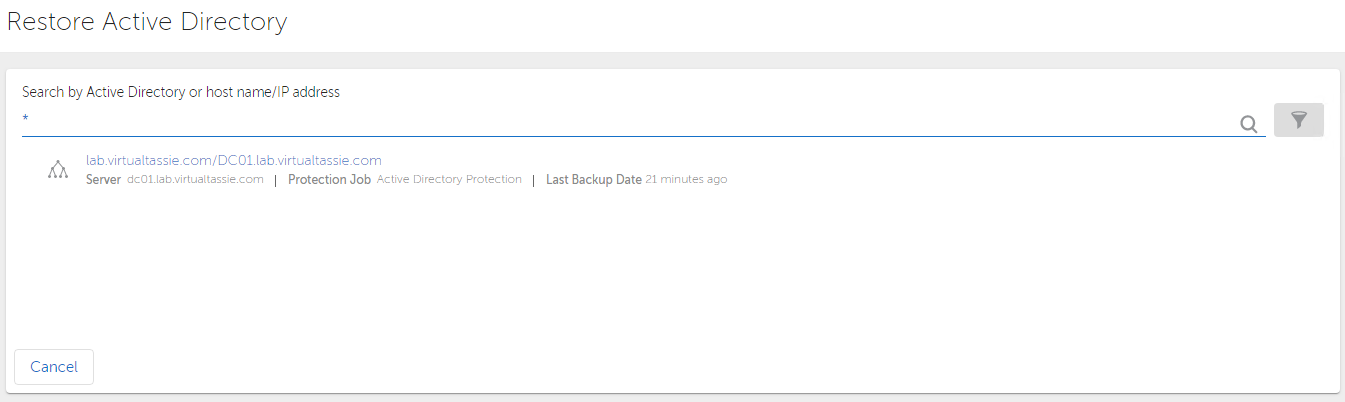
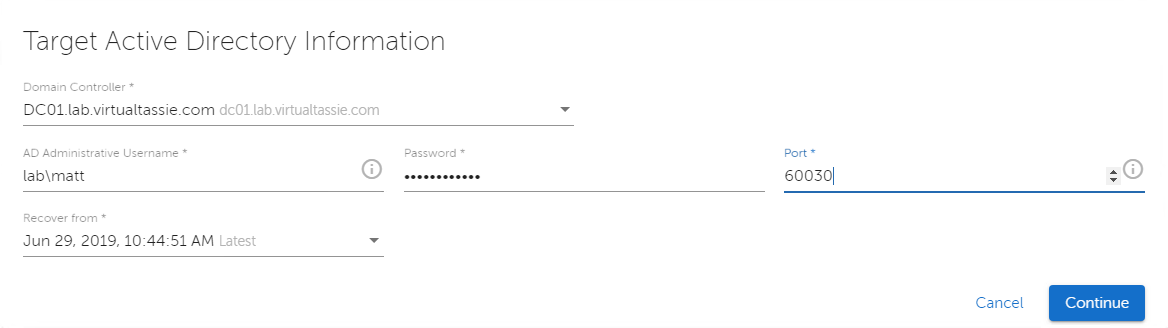
I get asked to search by AD or host/IP. I’ve only got one, so I throw in an * for a wildcard and hit search and sure enough my domain is shown as a result. After clicking on the domain name we’re asked for some information, including the AD username and password to use for the restore (requiring write / create access to the AD OU where the object is being recovered to), as well as a port range. The port specified here and the 3 consecutive ports are used by Cohesity and need to be allowed inbound by any firewalls to the target domain controller. Cohesity recommend a port range higher than 60,000 is used.
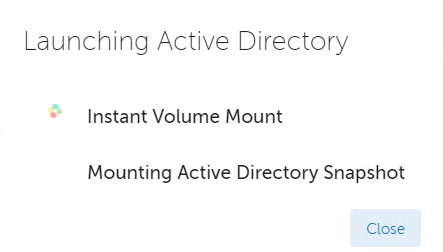
After clicking continue we see that Cohesity is performing an instant volume mount for the snapshot we selected on the previous screen. This only takes a second or two, and then we’re taken to a “Recover AD” browser.
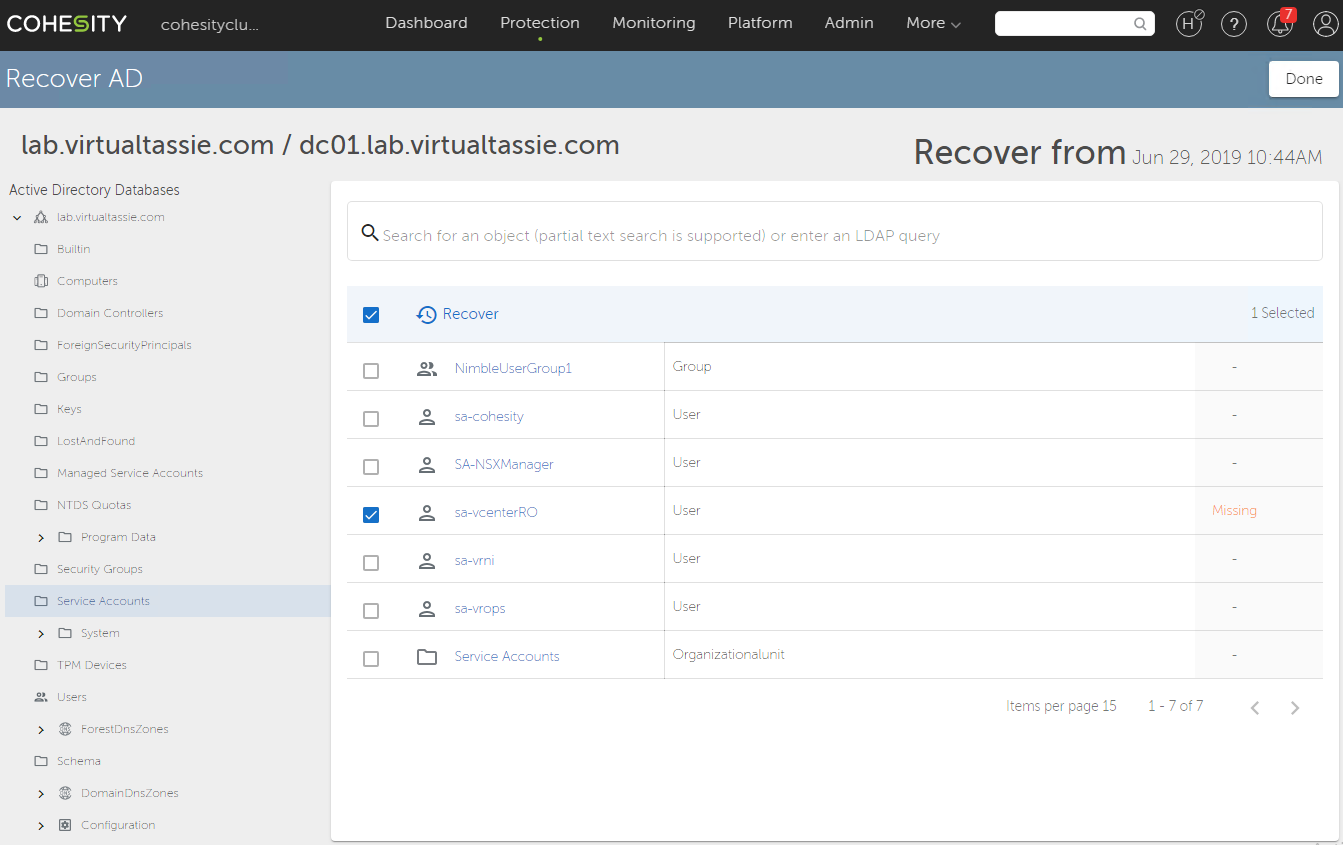
From here, you can choose to recover the entire database, sections of the database or go down to the granular level of restoring a single item, like in my case a single user account.
I browsed to the OU where my object was located and sure enough the user account is there and it also does a live comparison to flag that the account is currently Missing. I select the account and then click on the restore button to initiate a restore.
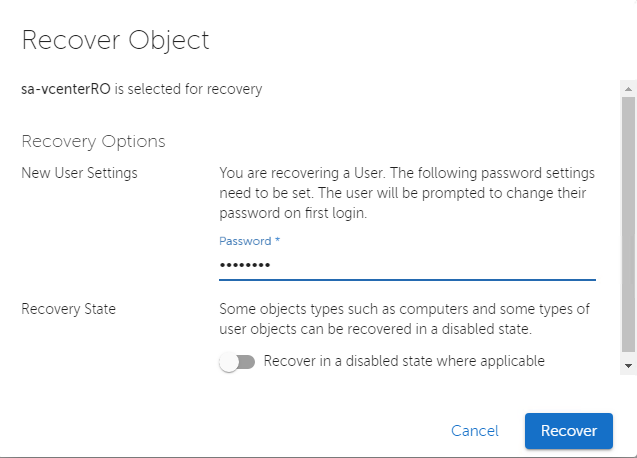
Because I’m restoring a user account, I need to set a password, and the flag then gets set automatically to have the user change this on next login. I can also choose to have the object restored in a disabled state if desired, but I leave this at default for my restore and then click recover. In a second or two I see a nice little green popup letting me know the restore is successful.

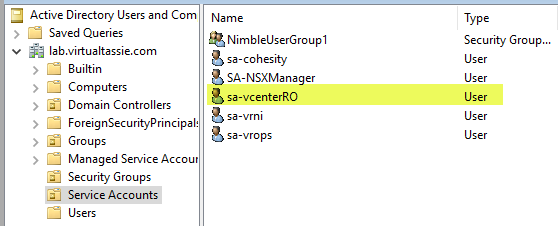
If I jump over to ADUC again and do a refresh, I now see the user account has been restored as expected.
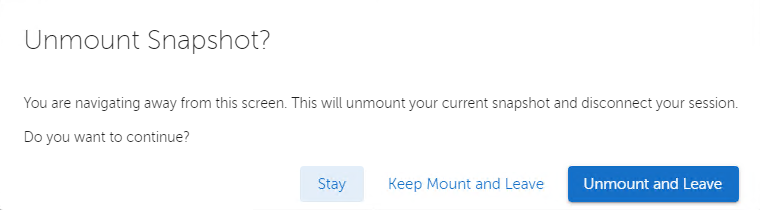
Back on the Cohesity platform, I click on Done and then get asked if I want to keep the snapshot, or unmount it. Because I’m now done with the restore I choose to unmount and leave, which concludes the restore process!