Introduction
With the release of Cohesity version 6.2, there is support to protect Exchange Online Office365 mailboxes natively within the product.
Protecting data in a SaaS platform is always an interesting discussion. At the end of the day, there is a shared responsibility model at play here, and as the customer and/or consumer, there are still some very valid reasons you’d want to ensure you are protecting business critical data such as exchange online mailboxes. The low hanging fruit that comes to mind as I write this post are things like malware, phishing and insider threats or attacks. Microsoft do provide some native built-in functionality for protecting data, but there are limitations with the offerings from Microsoft.
Cohesity will initially be supporting the protection of up to 10,000 mailboxes, integrated in to their existing protection job and policy workflows that you’ve hopefully come to know and love as a Cohesity customer or partner. Using Cohesity’s easy search functions provides the ability to search and restore individual items or entire mailboxes at a time with ease.
I’ve been lucky enough to have been granted early access to a virtual edition of the Cohesity appliance running version 6.2 of the software, thanks to some great local Cohesity guys (Pete and Hari) and I’ve been able to test the Office365 exchange online data protection functionality. As expected, it’s super simple to get set up and start protecting mailbox data, but I’d like to walk you through the steps in the post below for those that might be getting started with this new functionality.
Office365 Permissions
The first thing we need to set up are some permissions in Office365. This will allow the account we specify in the connection from Cohesity to Office365, to be able to access the mailboxes we want to protect.
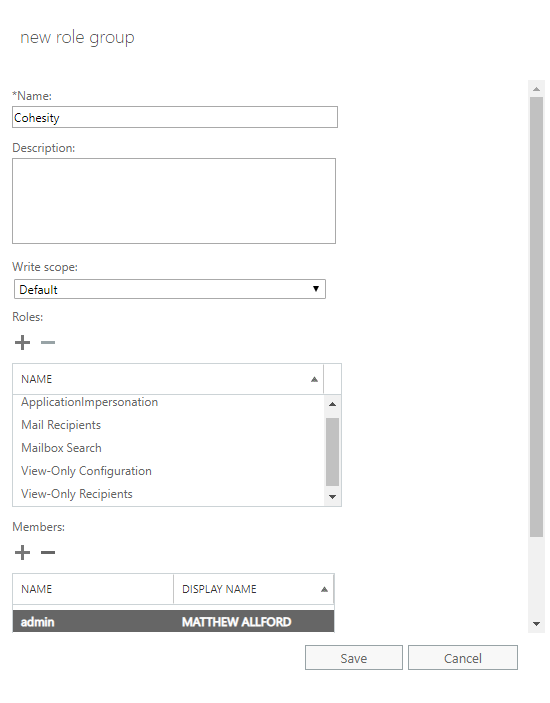
Log in to your Office365 tenant and open the Exchange Admin Center. From there, head to Permissions > Admin Roles and click on the “+” icon to create a new role group.

Give the role group a meaningful name so you know what it is doing, and optionally provide a description as well. The roles you’ll need to assign for Cohesity to work are:
- ApplicationImpersonation
- Mail Receipience
- Mailbox Search
- View-Only Configuration
- View-Only Recipients
Under the Members section, add the account that you want to use to connect Cohesity with Office365. In my basic example here, I’m using my Office365 admin account, but I’d suggest a specific service account is configured in a production environment. It may take a few minutes for this change to apply, so now might be a good time to grab a beverage of your choice before proceeding with the next step.
Register Office365 As a Source
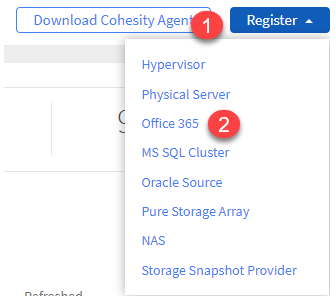
Now that we’ve sorted out the permissions side of things, the next step is to register Office365 as a source in Cohesity. This will connect Cohesity with Office365 and allow you to browse and select objects to include in protection jobs.
Log in to Cohesity and browse to Protection > Sources. In the top right, click on Register and select Office365 from the drop down selection.
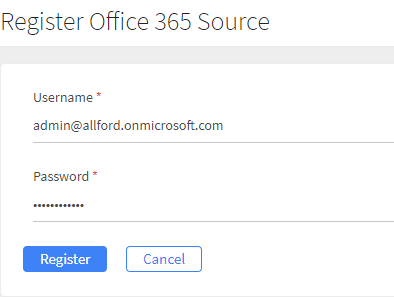
Enter in the username and password for the account we assigned to the custom role group in the previous step.
If you see the message below, you either didn’t get the Office365 permissions quite right, or you need to wait a few more minutes for the permission change to propagate throughout the Exchange Online environment.

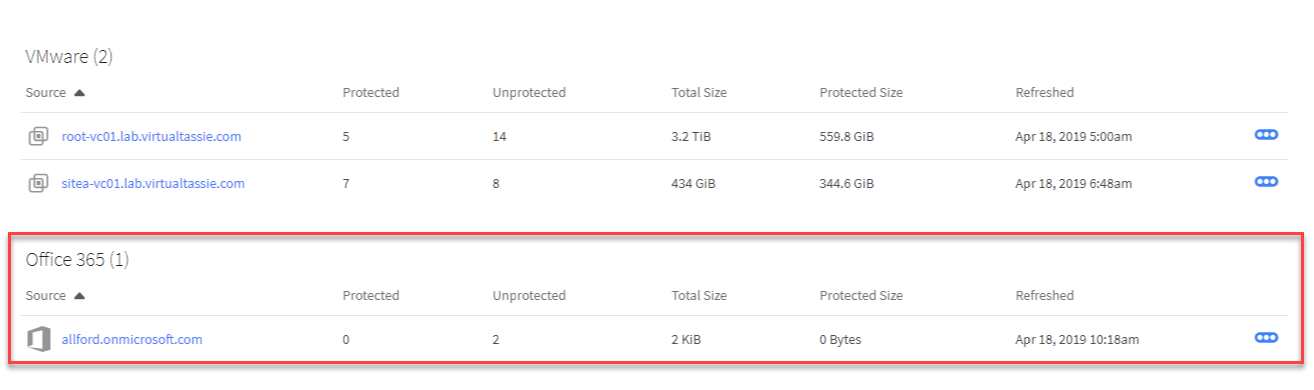
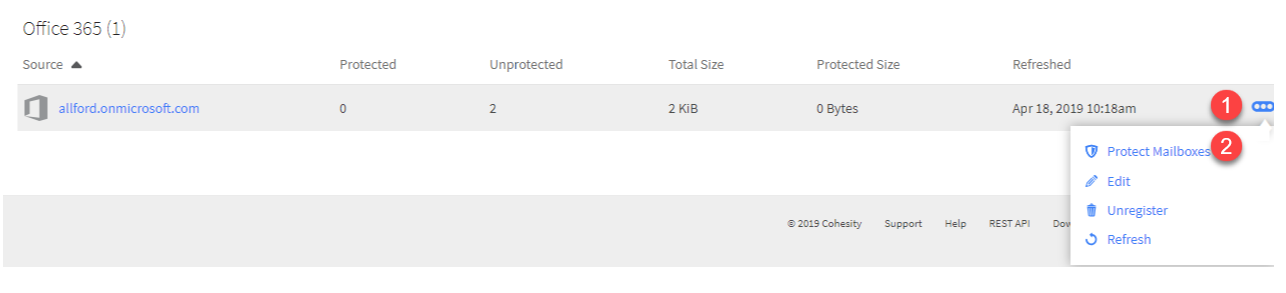
Hopefully it all worked as expected, and you now see an Office365 connection in the list of sources in your Cohesity environment.
Protection
The next logical step is to go ahead and create one or more protection jobs for the Exchange Online environment. From the sources screen where we left off, you can click on the ‘…’ icon and choose Protect Mailboxes to launch the wizard to create a protection job.
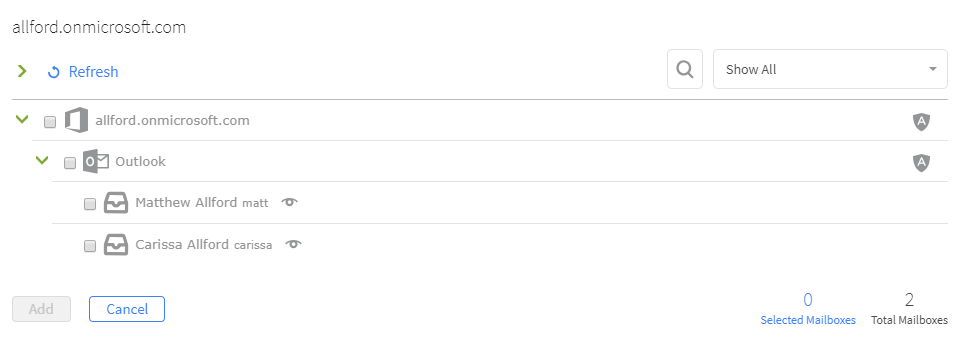
The first thing you’ll get asked is to select which objects you’d like to protect. As per the normal Cohesity process, you can choose which objects to protect at which level, and you can also choose to auto protect the object so any future objects that are created are included in the protection job. In my small environment, I only have two mailboxes (mine and my wife’s). Don’t tell her, but I’m going to use her mailbox for the rest of the demo!
From here, you get asked to specify normal settings for the protection job, such as the policy, storage domain and advanced protection settings. All of these settings are consistent with other Cohesity protection jobs, so there will be no surprises here and I’m not going to walk through these individual settings in this post, as they aren’t specific to the protection of Office365.
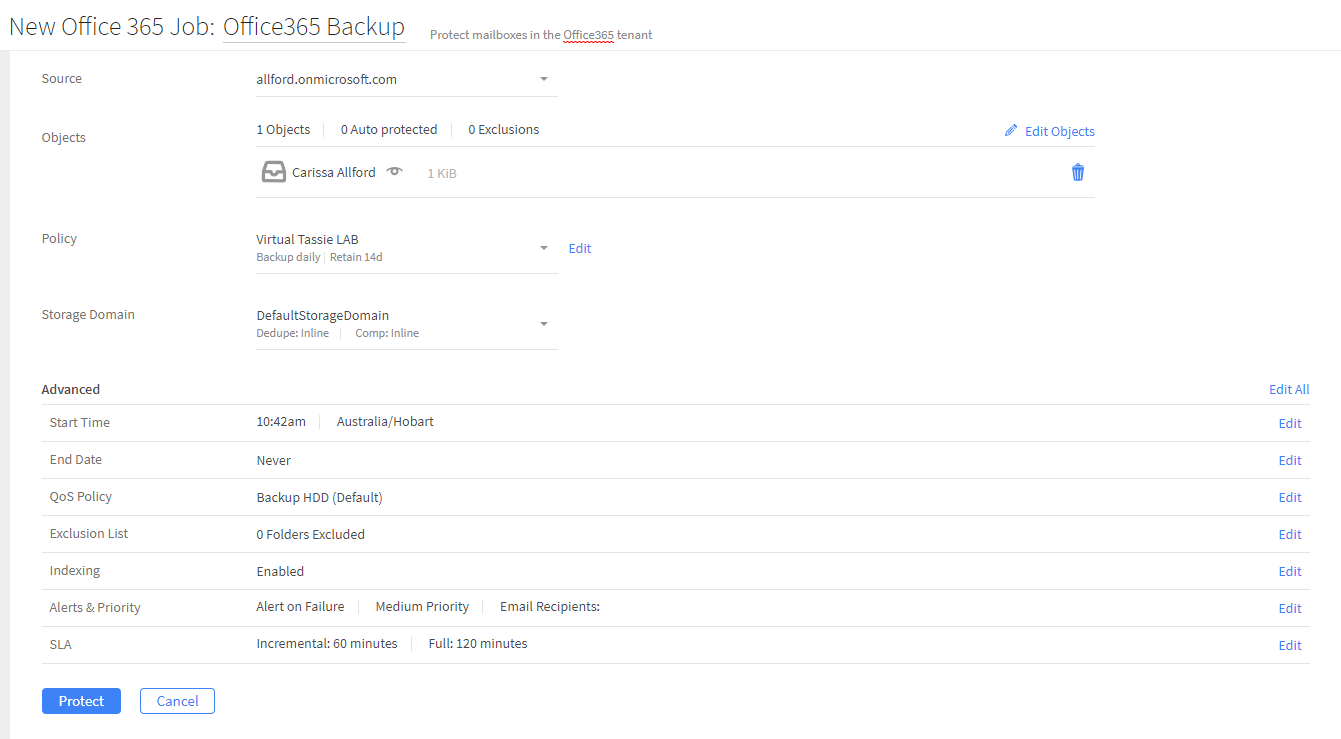
After the protection job is created, it can be run manually or alternatively will run automatically based on the policy you assigned.
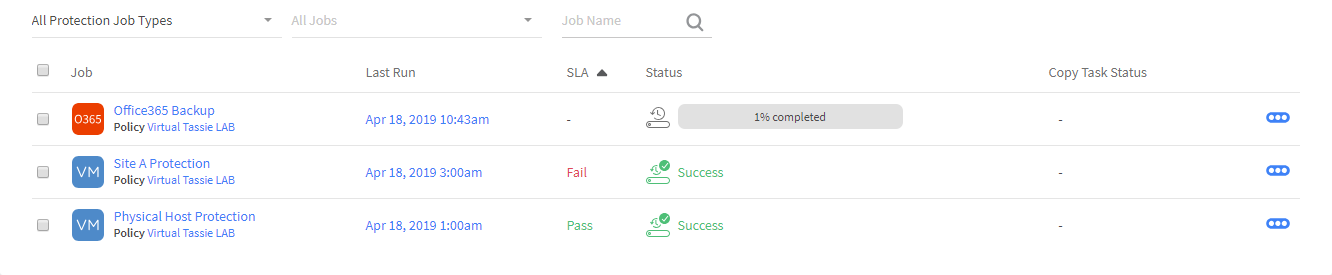
From a protection standpoint, that’s all there is to it! Hopefully you’ll never need to restore the data, but you know what they say about backups, so lets go ahead and take a look at what the restore process looks like in the next section.
Recovery
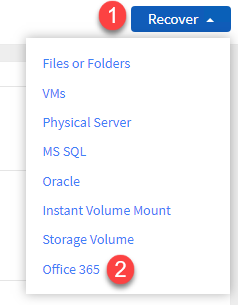
Recovery of Exchange Online is managed through the Cohesity platform under the same place you can initiate any other recovery, which is under Protection > Recovery. In the top right, click on Recover and select Office365.
In the next window you’ll be presented with an option to choose to recover entire mailboxes, or more granular items such as emails and folders. In the example below, I’m going to restore a single email. I simply performed a search for any email in my wife’s account from yesterday, and honestly most of it looks like junk mail! I’ve selected one of the random junk items as the item I’d like to restore, and then will click on Continue.

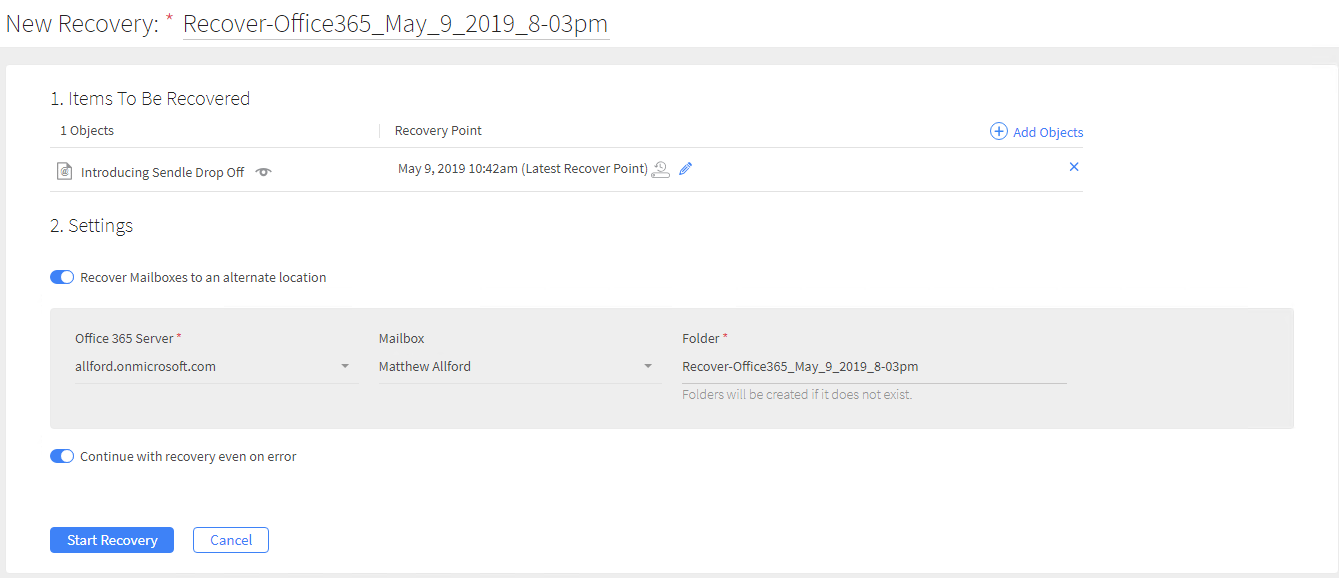
On the next screen, we’re presented with some additional recovery options. You can choose to change the recovery point if the selected one is not correct, and you can choose to restore to the original location, or to an alternate location. Some companies have processes in place that means data needs to be recovered to a temporary area to verify it has recovered OK before it is placed back in to the desired location. You can also choose to rename the recovery job, but by default one will be provided for you.
In the example below, I’ve chosen to restore the item in to my own personal mailbox and to continue with recovery even on error.
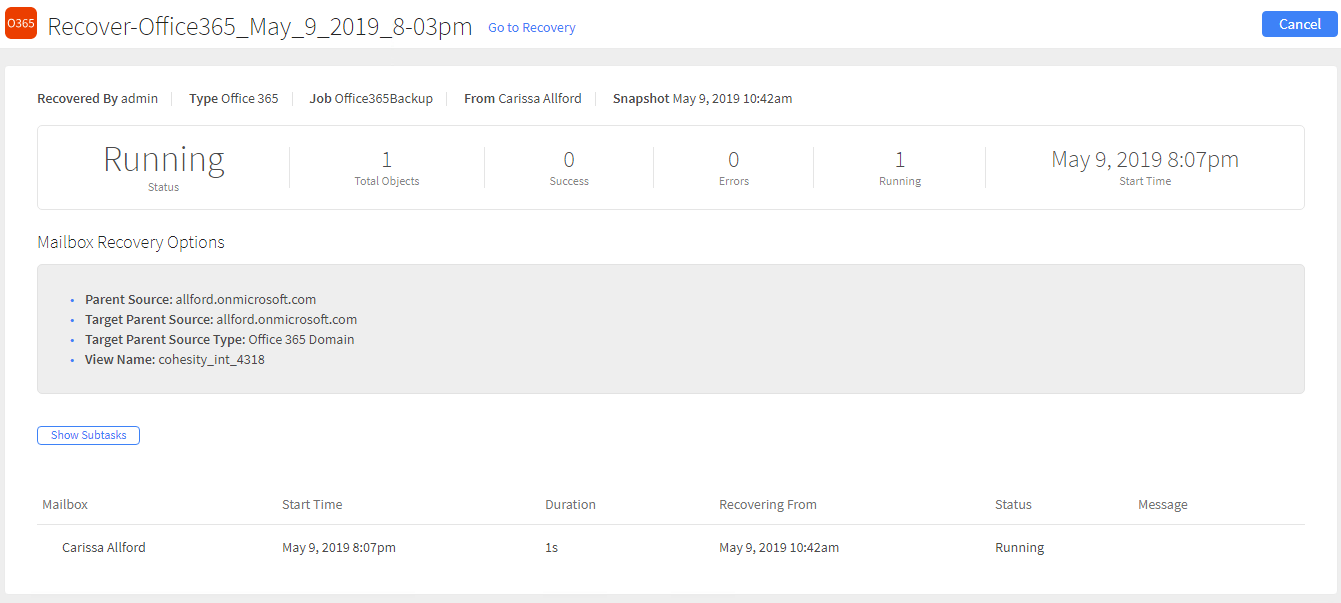
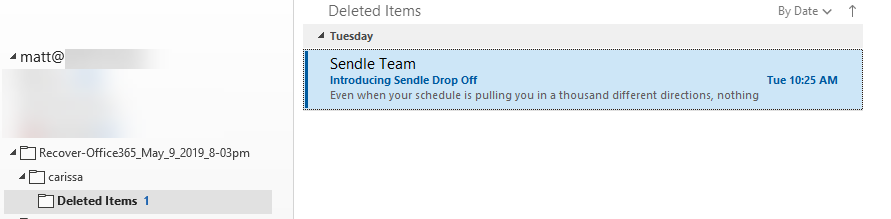
The screen you get taken to after clicking Start Recovery is the recovery job summary screen and my recovery finished after a short 19 seconds. I opened up my mailbox in Outlook, and sure enough there is a new folder with the restored item from my wife’s mailbox.
Summary
This was a relatively simple example, but I think that talks to the simplicity that Cohesity have built their platform on and if you are already familiar with driving Cohesity, protecting Exchange Online mailboxes will be a walk in the park. It’s great to see Cohesity bring in support for protection of SaaS data and I’m looking forward to seeing them bring in support for the rest of the Office365 portfolio, as well as protection for other popular SaaS platforms.
I hope this post has been valuable for you and if you are a Cohesity customer or partner, I’d recommend looking at the new functionality and providing any comments or feedback to Cohesity. They are a company that truly listen to their customers and partners and adapt very quickly based on feedback and suggestions.